We are, by no means, creative or handy. We used a little imagination and, believe it or not, some duct tape.
I have tried to make this as clear and easy-to-follow as possible. If you have any questions at all, feel free to email me at [email protected]
Good luck :o)
I have tried to make this as clear and easy-to-follow as possible. If you have any questions at all, feel free to email me at [email protected]
Good luck :o)
The Canopy
The fabric
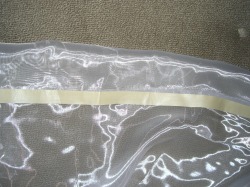
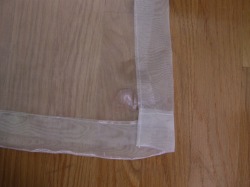
We started with purchasing organza at a fabric store. This is two 3-yard long pieces. We scotch taped them together, and taped the edges so it could be sewn together later.
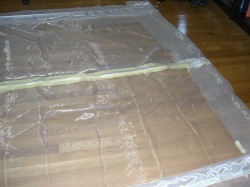
Here they are taped together, to be sewn along the center, to make one large piece of fabric.
The Center Piece
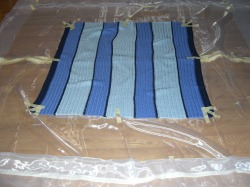
We are using an afghan crocheted by Jay's grandmother. She passed away recently, which makes it all the more special.
Ta da! Edges sewn, and center sewn. This was done by a friend of my mom's. I believe she just used a sewing machine.
attaching the afghan
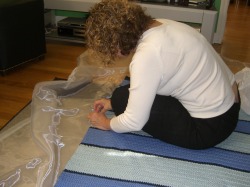
Here's my fabulous mother sewing the afghan into the organza. She's using a tapestry (i.e. thicker than sewing) needle and beading thread. It's kind of like fishing line, but easier to work with.
The Poles
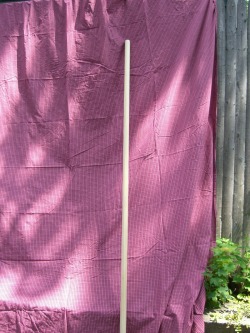
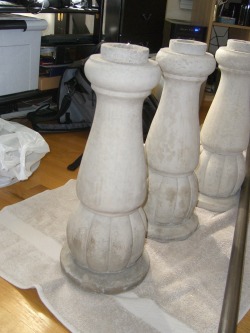
We went to Home Depot and bought 8' tall poles; 1 1/4" in diameter. (Cut them down to 7' tall.) Here they are, being prepped for spray painting. Don't forget to sand them down!
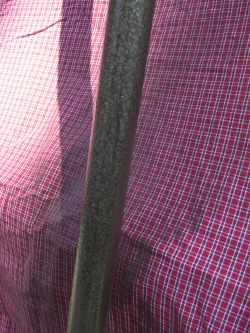
All spray painted. We used a "hammered" dark brown to give it a little texture. It actually came out really nicely. The texture is really visible.
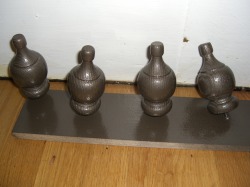
Also at Home Depot, we bought wooden curtain rod ends. Spray painted to match. (They have screws on the bottom and easily screw into the poles.)
We were initially going to have our chuppah holders stand up there and hold the chuppah the entire time. Once we realized that would make 17 people up there, we decided against it. Instead, they will walk the chuppah down the aisle and place it into these pedestals. They are birdcage pedestals, also found at Home Depot, which already have a hole right through the center.
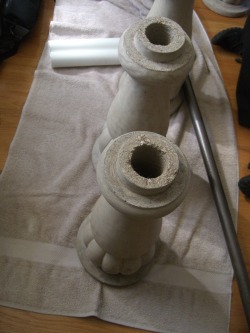
Here, you can see the center hole where the poles will go in.
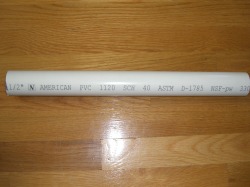
We bought PVC pipe (cut down to size) to stick down the center of the pedestals, so the poles will be more secure and won't wiggle around. We ended up needing to put some duct tape around the top and bottom of the pipes, just to make the pipe a bit thicker and, therefore, sturdier.
Hooray for duct tape!
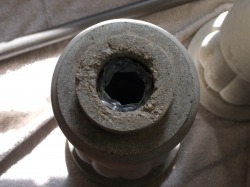
Here's looking down at the pedestal, just so you can see the use of duct tape.
Now this is where things got a little bit tricky. Okay, super duper tricky. Our original idea failed.
The thought was that we would attach the corners of the fabric to the poles by screwing the curtain rod ends through the fabric and into the pole. Unfortunately, the afghan was waaay too heavy and drooped super far down. (If your canopy isn't heavy, then you could do this and be finished!)
We brainstormed for a long time, then decided to walk around Home Depot to get inspired. I'll level with you--we walked around Home Depot for a good 40 minutes trying to think of something that would work. We had lots of ideas, but none of them seemed to pan out. Of course, there was always the standard option of nailing four pieces of wood to make a frame, but it was really important to us to have people carry it down the aisle. Thus, it had to be portable and fold in some way, so it could be brought down the aisle.
Here's what we finally came up with...
The Solution!
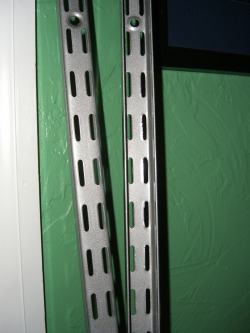
I have no idea what these things are called, but we found them in the shelving aisle. They're six feet tall. We attached them in the center with a nut and bolt and criss-crossed them, attaching them to the poles.
The almost finished product
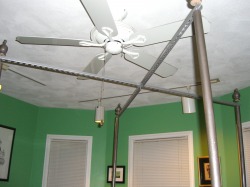
Sorry for the sucky picture. But this is the entire frame, completed. Metal things attached at the center by a nut and bolt. Then attached to the poles with the curtain rod ends. (We needed to get longer screws for the curtain rod ends, because the ones they came with were way too short. But that was no biggie.) It's a rough draft, so the curtain rod ends aren't screwed all the way in.
Ta Da!
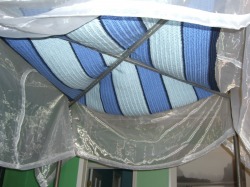
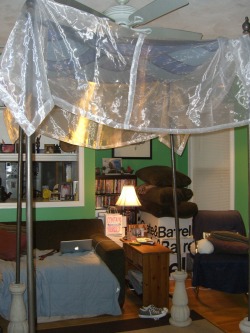
Here it is, looking up. It may not be the most beautiful thing, seeing the frame and all, but we don't mind so much about that. The last, final thing to do would be to tie the edges of the canopy up so they're not hanging down so low.
The most important parts are that we were able to use Jay's Nana's afghan, it was minimal in cost and it (most likely) won't fall on our heads.
The most important parts are that we were able to use Jay's Nana's afghan, it was minimal in cost and it (most likely) won't fall on our heads.
Again, sorry for the craptastic picture, but I wanted to show how nicely the poles look inside the pedestals. It's my favorite part.
The actual labor involved in this was minimal. It was really the thought process that took the longest.
It was an act of...like. Would I do it again? Probably. Cost was a big part of it--I have heard of renting chuppahs costing upwards of $600+. Especially now that we know how to do it and what will work, I imagine it wouldn't be quite so frustrating. (Not that I plan on ever doing this again. One wedding is enough for me, thank you very much.)
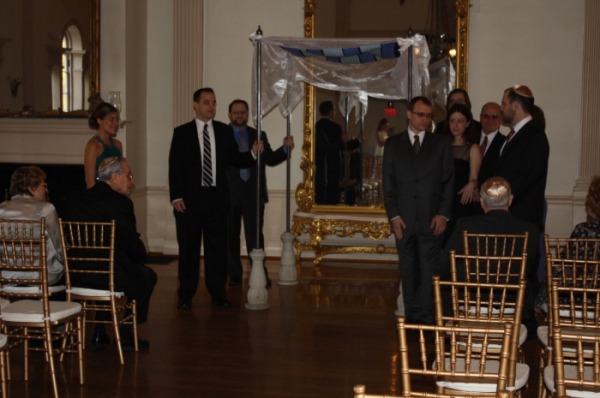
Below is the completely finished product, taken during our rehearsal. It worked out beautifully with the chuppah holders carrying it down the aisle and placing it in the pedestals. They stood up there for a few minutes while the rabbi thanked them and then sat down. It was great.